Monitoring an API via HTTP POST and Phone Call alerts
Learn how to monitor an API by doing an HTTP POST request to it every minute and instantly be notified when it goes down.


It all takes under 10 minutes so let’s dive in, head first.
Monitoring target API: Logflare
I chose Logflare because Chase asked me about monitoring APIs via POST, and it seems that we also need to ensure logging is happening at all times, so in this guide, we’re going to monitor the logging API of Logflare.
Sign up for a new account
Just head out to monitive.com and click Start Monitoring with any site you want, just to get into the dashboard.
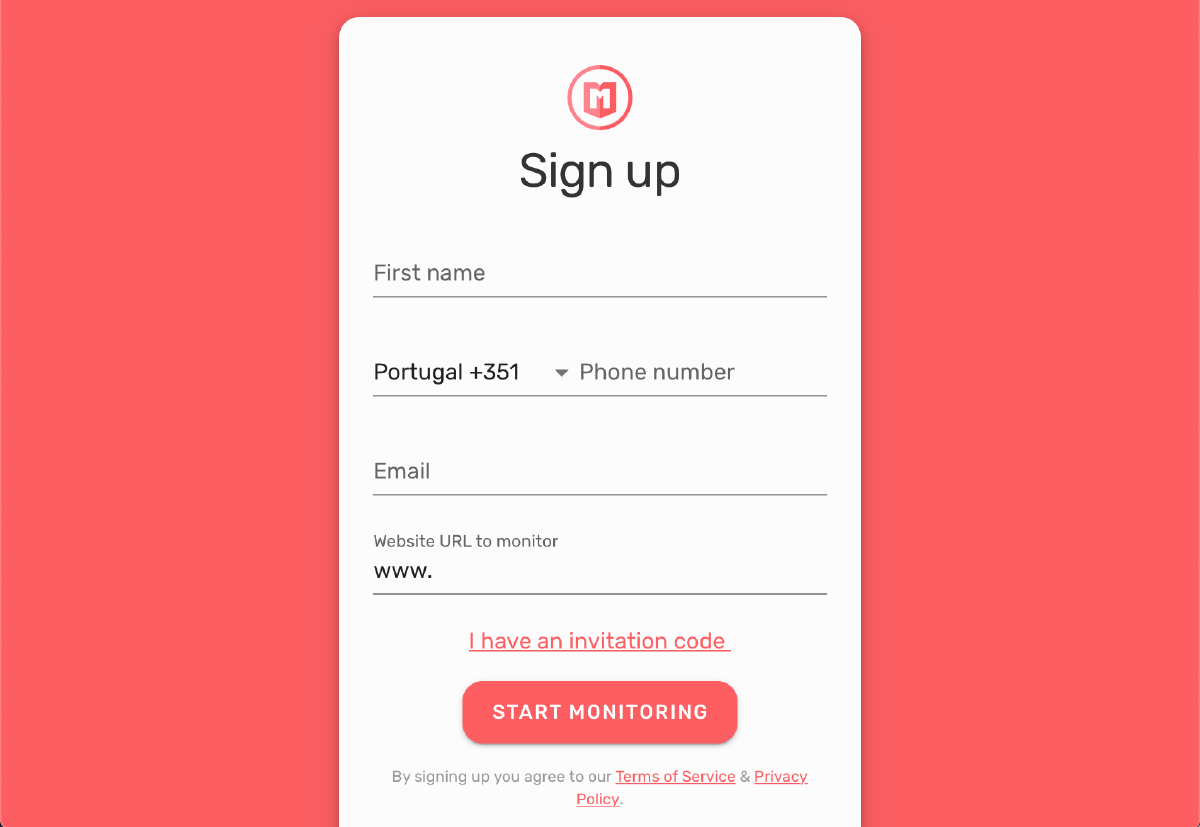
You’ll get all the features included for the 15 days of trial so that’s everything you need.
Get the details of the endpoint to monitor
We need to find out three things to monitor pretty much any API endpoint.
Luckily, Logflare made this part easy as all the information is one click away.
Sign up for a Logflare account, create a new source and click the “Setup” option in the source’s navigation bar.
1. The endpoint
https://api.logflare.app/logs?source=your-source-goes-here
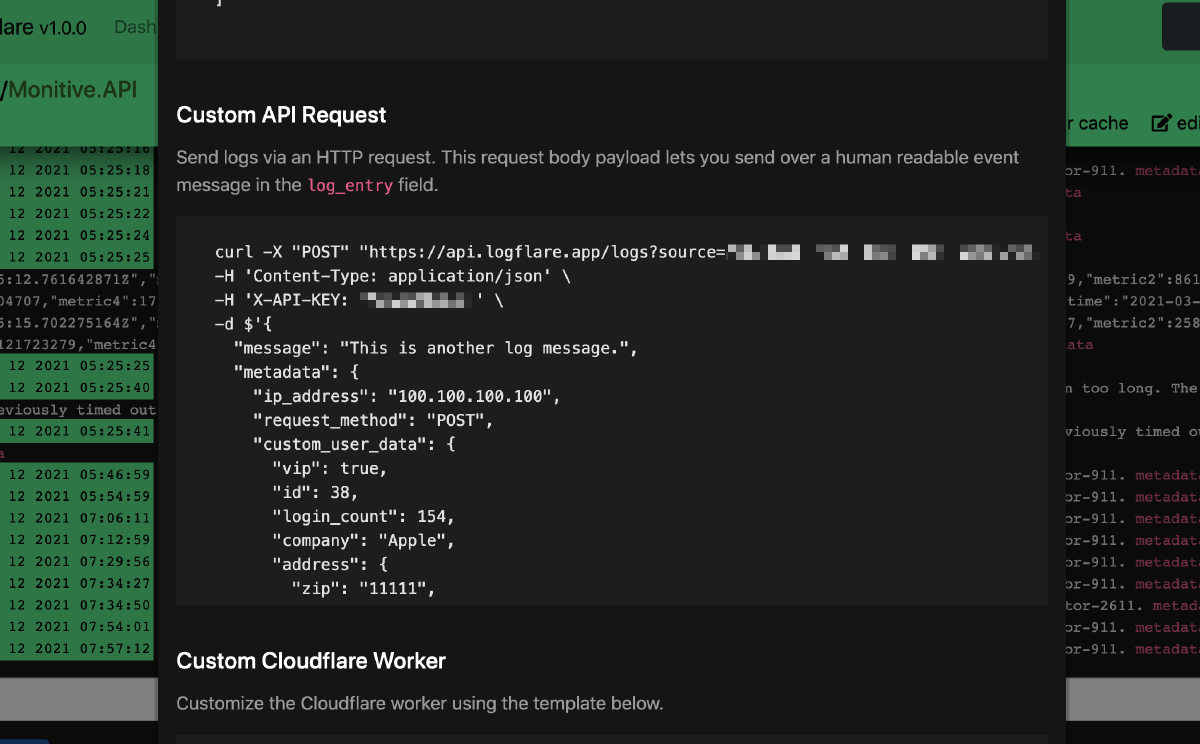
2. The payload
We’ll use the sample payload, but with our twist so we know what this is about when we see it in our logs:
{
  "message": "Monitive uptime monitoring heartbeat check.",
  "metadata": {
    "user_agent": "Monitive Bot",
    "link": "https://monitive.com"
    "request_method": "POST",
  }
}
3. The response
To get the response, let’s copy-paste the curl request into our terminal and see what it comes back with:
$ curl -X "POST" "https://api.logflare.app/logs?source=your-source-goes-here" \
    -H 'Content-Type: application/json' \
    -H 'X-API-KEY: YOUR_API_KEY' \
    -d $'{
  "message": "Uptime monitoring heartbeat check.",
  "metadata": {
    "user_agent": "Monitive Bot",
    "link": "https://monitive.com",
    "request_method": "POST"
  }
}'
{"message":"Logged!"}%
Voilá, the response is {"message":"Logged!"}.
Let’s keep this handy for the next parts.
Enable the required features
To monitor an API, we’ll need to enable a few features in our new Monitive account, so head out to the Features & Apps page to turn on the features we need.
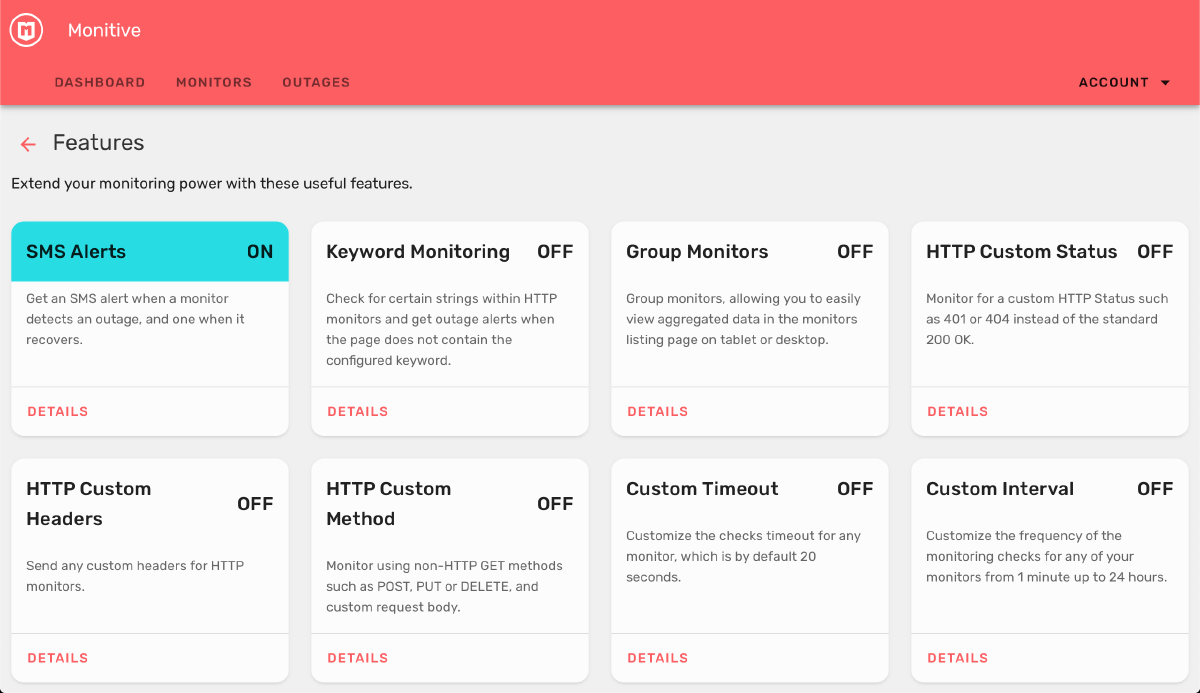
and turn on the following:
- HTTP Custom Method because we need to monitor the API via an HTTP POST request, not our usual HTTP GET;
- HTTP Custom Headers to be able to specify the Content-Type and Authentication;
- HTTP Custom Status is optional but required if the response from the API is not a standard 200 OK;
- Keyword Monitoring to check if the response is what we expect it to be;
- Custom Locations to set monitoring only from the US, as we’re not looking to see if the API responds from Japan, but from our servers.
- Custom Timeout because if the response takes longer than 10 seconds, it’s bad and we want to know.
Add the API monitor
Head out to the Monitors page and click the Add New Monitor.
We already know what we need to monitor, so let’s fill it in:
- Monitor URL:
https://api.logflare.app/logs?source=YOUR-SOURCE-ID - Monitor Name:
Logflare Custom API - Keyword:
{"message":"Logged!"}(what we’re expecting to get in the response) - HTTP Status Code can be left empty if it’s
200(our case) but feel free to set it to201or whatever your response should be. - HTTP Method: select
POST - Headers: add the JSON content-type and the authentication header:
Content-Type: application/json
X-API-KEY: YOUR-API-KEY
(Replace YOUR-API-KEY with your actual API key)
- Timeout: select
10 seconds - Check locations: Select only the US locations.
Make sure you select at least 4 locations, otherwise double-checking might not be efficient.

Now to set up our alerting rules, scroll down the page.
We’ll want to be notified immediately via Email, and be called in 3 minutes if the API endpoint is down for more than 3 minutes.

Turn off SMS Text, and in the Phone Call dropdown, select After 3 minutes.
Testing our new monitor
Click Test in the upper right corner of the Add Monitor window.
We should get “Test Result: Monitor is up” if all the settings are right.
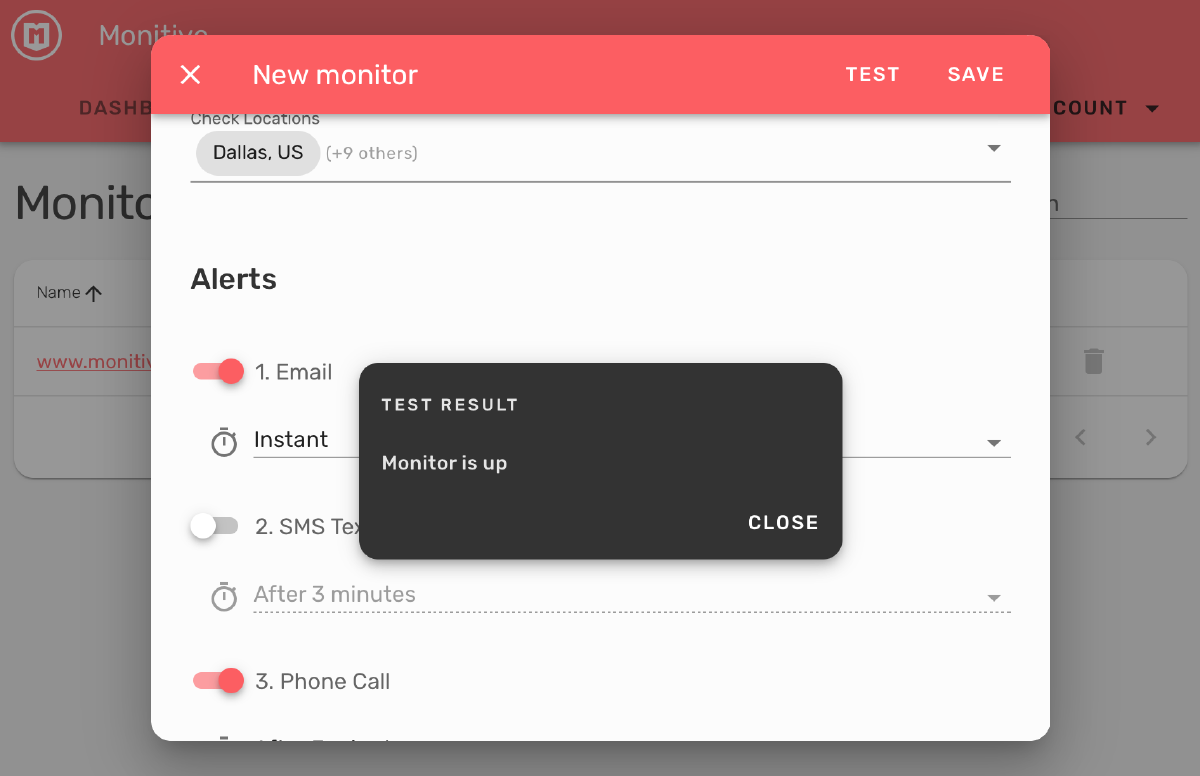
Click Save (next to Test) to save this new monitor and start checking it.
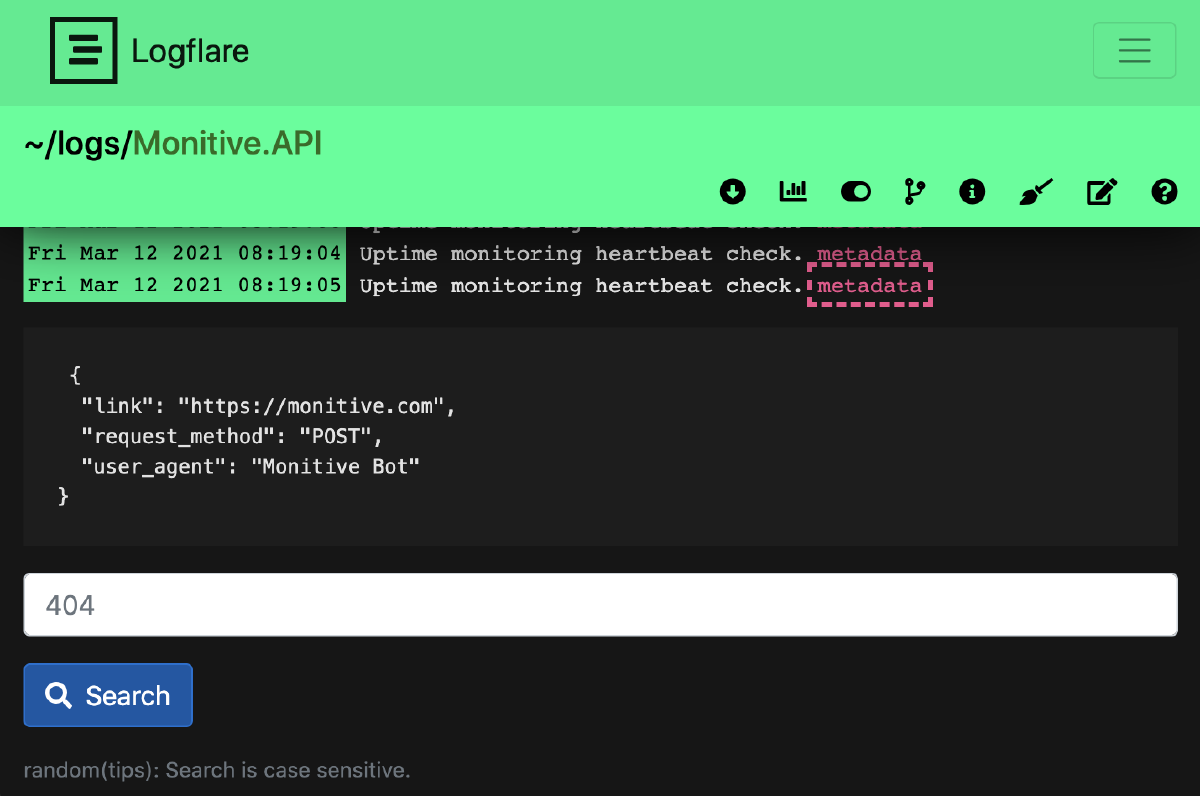
Checking Logflare
Since we’re doing an actual request, we should see the requests in Logflare. Open Logflare and see if the message sent by Monitive is there.
That’s it!
You’re done!
From this moment on, we’re checking the Logflare API every single minute and you can be confident we’ll let you know if it ever goes down, for whatever reason.
